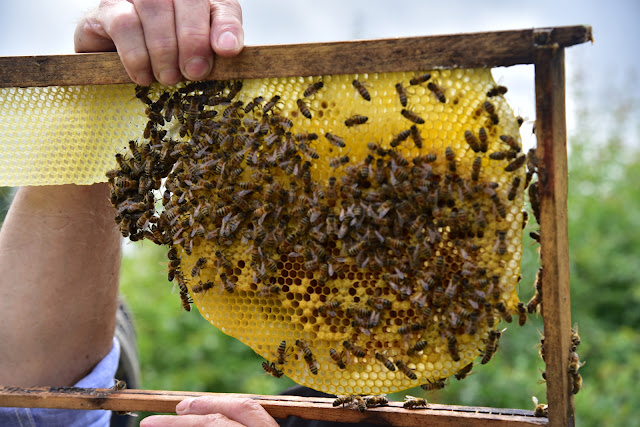
Courtenay and me drive down to Ashburton on Saturday to learn more about our venture into beekeeping. A deep subject which a relative beginner may explore with the bare minimum of knowledge, soon to become aware that his bees know more than he does. We had better get to understand them a little better.
Several different types of hive and sorts of colonies are shown here. Twenty or more of us donned bee suits, so that we could get up close and personal with these insects that are so essential to the environment. To begin with an illustrated lecture was held, including question and answer sessions.
 |
Here is a colony in terminal decline, queenless and starving, housed in a top bar hive where all appears much too quiet.
|
Later a tour of the apiary, where some of it secrets are shared.
 |
The bars here are parted to reveal the inward sloping shape of the hive walls and a central bar on the left is slotted to allow two removable little dowel rods to be removed .. A feeder bowl may then be placed on top to contain syrup or fondant, if the keeper decides to help them through lean times of the year.
|
 |
The composted wood chip floor seen deep in the bottom is held in a half round pvc gutter running along, fixed under the hive.
|
 |
The drones are all male and slightly larger than worker bees but the workers take longer to mature through their larval stage.
|
 |
Here the aluminium feeder is seen replaced above the middle top bar. At each end of this a blanking bar confines bees to their reduced section while the open section here, nearest the camera remains void. Normally a more vigorous colony would expand into it.
|
 |
This innovative hive has a feeder seen on top, a queen excluder half way down, confining the queen to the lower two sections. It is quite healthy
|
 |
The water spray is used in preference to a smoker. The short wooden bar is designed to be capable of introduction to other hives. The bar has removable plastic capping at each end and may be extended to fit any other type of hive as required
|
 |
Atomizer is aimed down onto the exposed top of the hive to discourage bees from exiting out of the top
|
 |
Inspection over and back it goes into the top section from which the queen is excluded
|
 |
The top two sections are being lifted off to reveal the queen excluder. Our host and tutor Phil Chandler is here showing his innovative own design of hive dubbed the "Four Square".
|
 |
The bottom two sections are where the queen lays and is constantly fed her royal jelly
|
 |
The flow hive here is shown about to be opened. Not a hive in use by professional keepers due to its prohibitive cost
|
 |
Bottom entrance of the flow hive
|
 |
The combe is artificially manufactured of acrylic but the cells are a formed from a vertical alignment of zigzag strips that alternate to allow honey to either be contained or flow down through . A top keyway moves alternate strips up or down while a bottom trough collects the drained honey to be decanted.
|
 |
The brood is confined to the bottom sections below the excluder - the queen is too big to pass up through the slots of the mesh.
|
 |
The excluder laid on top and about to be topped itself by the upper section flow-combs that are man-made of plastic (top). Top centre of picture shows the side door giving access to the keyways
|
 |
Replacing the roof
|
Courtenay's flow hive back home has been clogged up with solidified honey due to the bees feeding off Rapeseed fields that flowered some weeks ago. Later in the year a similar risk is with the Ivy which provides a distinctive flavor but also is so rich in sugars that it would also solidify quite quickly if left to settle in the flow hive. We later get together and study his flow hive to better understand the mechanics and decide how best to clean it up. I was especially eager to see how the plastic cells open and close and understand how the honey was prevented from leaking down through the combe. The cell halves appear to be designed to slide past one another without touching and the initial gap must be closed and the cell prepared by the bees before becoming filled. We had to insert the key paddle an inch or two at a time and twist firmly to shift the assembly open / closed. It will later have a clean up in boiling hot water.


No comments:
Post a Comment