At least 15 killed since August. No not wasps, not vermin, not even a convicted murderer.
But a submissive, innocent coloured gentleman of 40 years with a twin sister who remains distraught at his loss.
Out of america comes many things - the good, the bad, and the ugly. But this Oklahoma murder must be the last in a line of evil murders by a police force on the rampage.
The pack of cop-dogs fearlessly surround their victim like animals, unafraid because they see the black as unarmed easy prey. One female shooter has since been charged but her uniformed helpers, equally guilty of murder, run free.
Read the Huffington Post report here if you can stomach it: America
The bees-knees in design - I favour this one - "The Barn" or "Cathedral" top Bar Hive.
Top bars rest on side rails (not yet fitted here)
It does take some time and patience to make. Here are notes for those inclined to try this productive hive. (Sketches follow later and earlier posts show bees enjoying my efforts to house them.
Using untreated wood, the roof and upper half overlap the lower half, so that water is shed and the inside remains dry. The process of putting the 60 degree angle onto the boards is best achieved by clamping three boards together, stepped so that all three together form the angle as measured by a bevel, set at 60deg. The square edges are then planed and shaved down by electric planer, hand plane and draw knife. The hand plane alone is sufficient but labour intensive. Edges and ends may be screwed and glued, or pegged with wooden dowels. The roof is longer by about 70 mm, so that a drip channel can be routed into the underside of each end. The long edges of the roof should overlap the underside by about 15mm . Western Red Cedar is the ideal weight and naturally weather resistant, but almost any type of wood may be substituted. The top bars are fiddly to make, each having two mitred 60deg. corners and a strengthening tongue inset at each of those corners. Alternatively the corners may be simply screwed together after first gluing and setting up in a jig to the correct angle. The bars have a 3mm side slot cut to allow air to vent upwards between bars and into the roof void. The slot should be approximately 60mm long, on one side only. The router makes the job easier but a spokeshave would achieve the same result. Bees adapt easily to most situations and will fill much of the slotted cut with propolis until their desired temperature balance is achieved. A brushing of the underside of the bars with melted beeswax is my method of encouraging bees to build their comb straight, but firstly the bars should be scorched with a blow lamp to render them sterile. The entire hive may be scorched before being painted or rubbed down on the inside with a mix of beeswax and an edible oil such as flax oil. This may be made by melting the wax into heated oil in the proportion of approximately 1 : 4, taking care not to overheat. The resultant wood finish is quite harmless and can serve to attract bees into the empty hive. Waterproofing is achieved by a plastic or thin metal top sheet or paint, whichever you prefer, so long as the final coat is reflective and light in colour, against the summer sun. The lower half may be left natural wood finish, given a couple of coats of varnish .
The design described has been chosen because it enables all management procedures to be achieved with the minimum of disturbance to the bees, and reduces lifting effort required by the beekeeper. The cross holes in each bar allows bee traffic between the combs via the uppermost and warmest route. This feature benefits overwintering by enabling bees to transit each comb without venturing downwards into the cooler levels of the hive.
A Varroa trap floor may be fabricated in the form of a shallow drawer inserted through a slot cut in one end of the hive. By smearing a coat of Vaseline onto its surface mites get stuck there. Above the drawer a metal mesh floor is stapled in place to prevent bees getting onto this lower level.
There are many designs of bee hive and the fact of the matter is that our creativity can run riot. One may adapt an old chest or toy box, a wardrobe, even a dressing table, but my choice is governed here by the work others have put into this particular design. It gives a head start to your beekeeping and comes with no unpleasant surprises. You may prefer to use a traditional straw domed hive or one of the many other traditional and well documented standard types of hive - "whatever turns your crank" - as my dear auntie Betty would say.
Probably too late to capture the colony no. 2 due to a natural swarming out of the barn wall.
My hopes for bees from out of the masonry diminished yesterday.
A trap hive was hauled to the top of a ladder, set against the barn and a mesh funnel deployed over the colony exit. Wasps were seen raiding the depleted nest. A colony defenceless compared to the week before.
Meanwhile the Cathedral Top Bar Hive thrives. The following video shows all the bars removed except those holding comb. The two jars of syrup have just been re-filled and the varroa tray beneath the wire mesh floor temporarily removed, to allow some bees to escape. They had somehow found a way under, despite my best efforts to make it proof against such an event.
Apologies for the noisy clicking camera focus.
The combs nearest the camera are relatively new, those farthest away and now expanded almost the full extent of the width available, contain brood and will soon be hatching the worker bees that will hopefully overwinter through to early spring of next year. Five combs just two weeks ago have expanded and seven combs are showing - probably double the overall comb area.
The bees are in charge at hive No 1 and reminded me with a full on attack to my forehead at 5.30pm today. Their mood seemed much altered from the earlier days of settling in to their location in Courtenay's garden. The wind is fresh from the south east. Honey stores and brood are building well and they have much more at stake to defend. Latest Images At the outlying site farther afield hive No 2 is also deployed, in addition to a bait hive, which is located just below a colony deep within the brickwork of a farm building. Almost immediately the scouts began investigating the two hives, so I was hopeful they would choose to move in. After waiting several days and with no progress towards a move by the bees, I plan to use a trap out method for their removal from the barn. Plan B will involve the use of a one-way funnel to allow escape but prevent re-entry through the hole in the wall. The bait hive is to be deployed close to the funnel base and the bees hopefully will choose to move inside, including the queen with any luck.
This late in the year they will need feeding and ongoing support through the winter months in order to boost any chance of survival.
Bees within the brickwork of the studio / barn.
Allowing trapped bees to escape. The dark patches here seen along the joint line between brickwork and blockwork are the bees at their entry point.
Vacuuming the bees was not successful - Several perished - Entry/exit point inside sealed up.
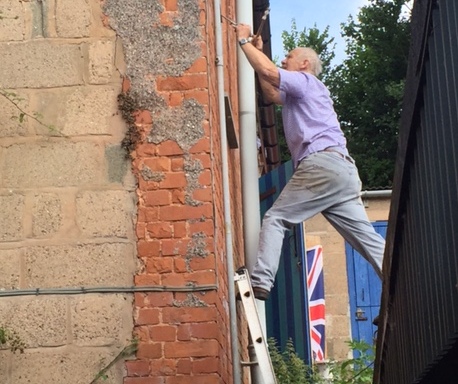
A rescue operation was first accomplished of bees trapped inside the building., They could find no escape from behind the non opening window. The method was removal of a pane of glass reachable by shinning up an extending ladder.
Half size bait hive attracts attention but since removed for minor alterations pending the trap out.
A trap out will be required to re-locate this colony. The window pane top right of the picture had to be removed in order to rescue some.
Attracting attention from scout bees. Unlike No 1. hive this No 2. hive has two entrances - one each side low down, so that is can be utilised for combining or splitting colonies. Phil Chandler Explains - Get his book !